September 29, 2026 · Updated November 3, 2026
How to add AI voiceover and captions to a video
Add an AI voiceover and captions to your video in genvi. Make a voice from your words, then let Auto Captions write the captions for you.

A short video works better with a voice and words on the screen. This guide shows you how to add AI voiceover and captions to a video in genvi. You type what you want said, genvi makes the voice, and Auto Captions adds the words on screen for you.
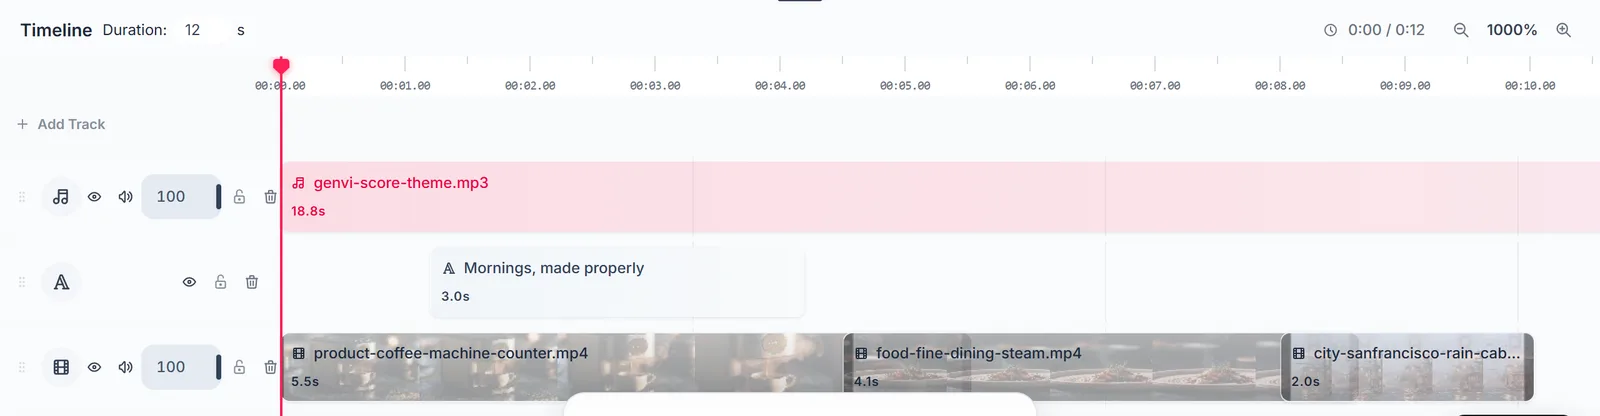
The Video Composer. Your video and audio sit in rows called tracks. The tracks play together.
What you will make
A video with a spoken voice and captions that match the speech. Captions are normal text, so you can fix or restyle them afterwards.
What you need
- A video clip in your File Repository (the place where genvi keeps your files). To make one from a photo, see how to animate a photo with AI.
- A script, which is just the words you want spoken. A few sentences is enough.
- A genvi account with credits for the voice.
Step 1: Write the script for your AI voiceover and captions
Keep the script short enough for your video. People speak about 2.5 words each second, so a 20 second video fits about 50 words. Write short sentences, and spell numbers the way you want them said.
Need help with the words? Open Chat Studio, set Kind to Text and ask for a draft.
Step 2: Generate the voiceover
You can make the voice in two places.
- Chat Studio. Set Kind to Voice, paste your script and pick a voice model (the AI that makes the voice).
- Node Studio. Add a Text to Speech node (a block on the canvas that does one job). Connect your script from a Text Prompt node, choose a voice and click Run.
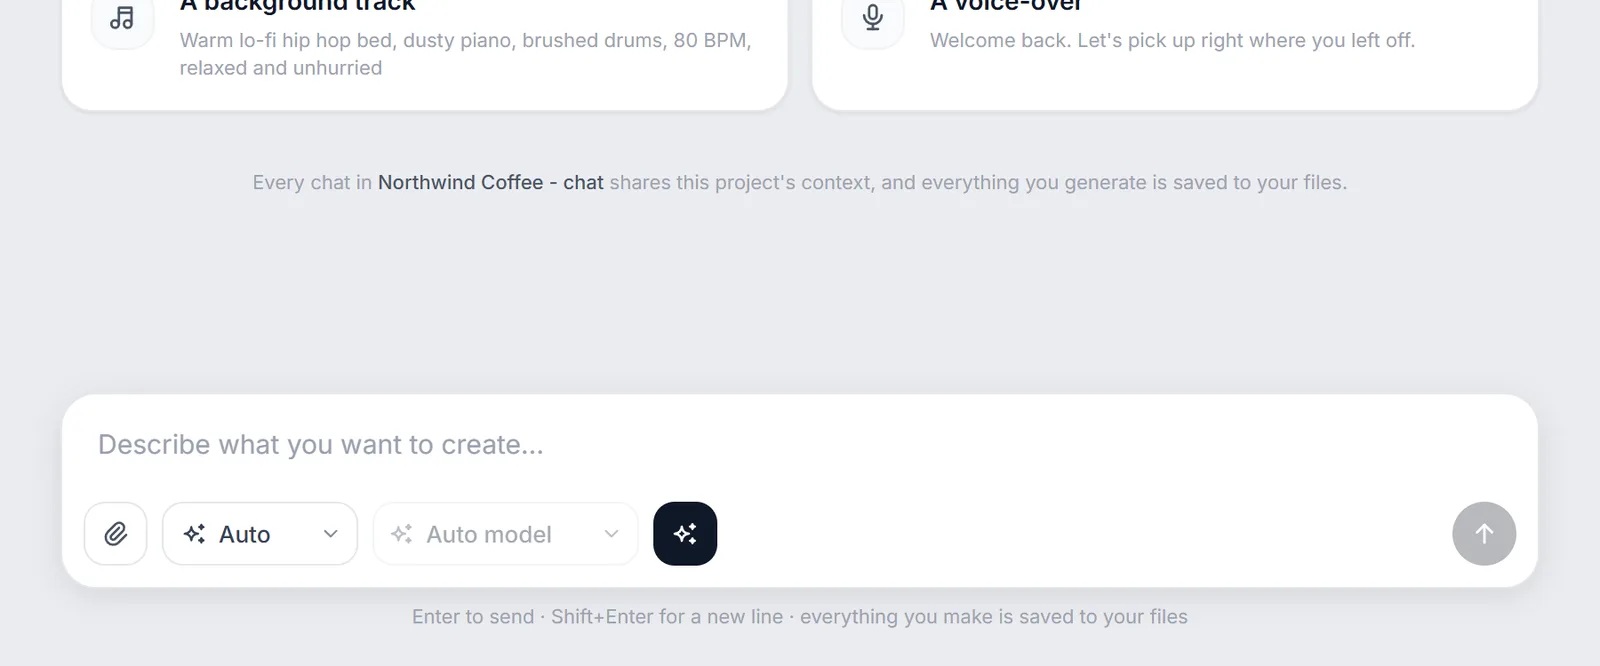
The Chat Studio control bar. Set the kind, then pick the model.
genvi has many voice models, such as ElevenLabs v3, OpenAI TTS-1, Gemini 3.1 Flash TTS and Kokoro TTS. Kokoro is the cheapest way to draft narration, so use it for drafts. When the script is final, make the last version with the voice you like best. Voices are priced per run, and you see the price before you run.
Listen to the result. If a name or number sounds wrong, spell it the way it sounds in your script and run again.
Step 3: Build the timeline
- On the Dashboard, click New Project and choose Video Composer.
- Drag your video clips from the File Repository on the left onto a video track.
- Drag the voice file onto an audio track. Slide it until it starts where you want. If there is music, use the clip's Volume control to turn it down.
- To shorten a clip, drag its left or right edge. To cut it in two, move the playhead (the line that shows the current moment), right-click the clip and choose Split at Playhead.
Step 4: Add captions automatically
This step writes the captions for you.
- Right-click the clip that has the speech. This is the voice file, or a video of someone talking.
- Choose Auto Captions. You will see "Captioning…" while it works.
- When it finishes, a message tells you how many captions were added. They appear on a new Captions track.
genvi listens to the clip and turns the words into short captions that are easy to read. Each one shows up to six words on up to two lines. If you do not like the result, click Undo and the whole Captions track goes away.
If you see "This clip has no audio track to caption," the clip has no sound. If you see "No speech was found in this clip," nobody is talking. Only the first ten minutes of a clip get captions.
Step 5: Check and fix the captions
Captions are text on a text track. Click one to change its words in the properties panel, or drag its edges to change when it shows. Watch the whole video once with the sound on. Check names and brand words first, because those are the easiest to get wrong.
Step 6: Export
Click Export in the top toolbar. Choose a size (720p, 1080p or 4K) and a shape (16:9, 21:9, 1:1, 4:5 or 9:16). The captions are part of the picture, so they show in the exported video. A video with sound is saved as an MKV file, a common type of video file. The export runs in your browser, so keep the tab open until it finishes.
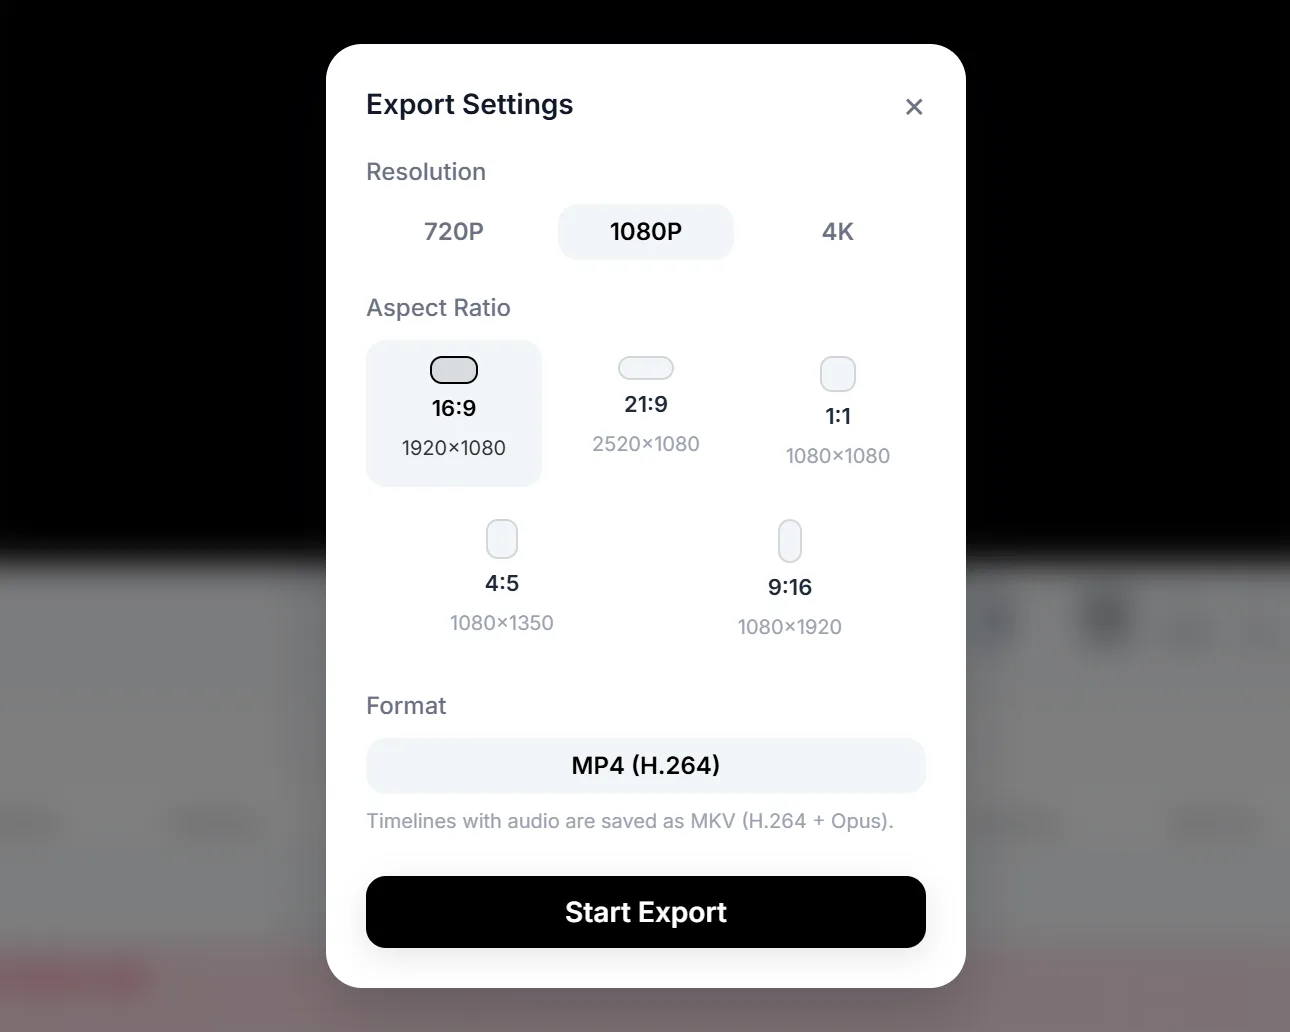
Export settings: size, shape and file type.
Tips
- Caption the voice, not the final mix. A clean voice is easier to write down than speech under music.
- Make a tall version. For short videos on phones, choose 9:16 when you export.
- Video models that talk. If a model such as Veo 3.1 makes someone speak, use Auto Captions on that clip. To write the line well, see how to write prompts for AI video.
What it costs
The voice is a normal generation. Its price depends on the model you pick, and you see the price before you run. If the run fails, your credits come back. Auto Captions does not use credits.
FAQ
Which languages do captions support?
Captions use the language spoken in the clip. We have not tested every language, so try a short clip first.
Can I use my own recording instead of an AI voice?
Yes. Upload your audio to the File Repository and drag it onto an audio track. Auto Captions works on any clip with speech.
Can I change the caption style?
Yes. Captions are text, so you can change the font, colour and position in the properties panel, just like a title.
Why did only part of my clip get captions?
Auto Captions covers the part of the clip you use on the timeline, up to ten minutes. Split the clip and run Auto Captions on each part.